Affiliate Disclosure:This article contains affiliate links. If you purchase through our links, we may earn a small commission at no extra cost to you. We only recommend gear we've tested or would genuinely use ourselves.
how to • May 11, 2026 • 11 min read · The Bite Intel Team
How to Set Up a Kayak Fishing Crate (Step-by-Step)
Turn a blank crate into a fully rigged tackle station. Step-by-step instructions for rod holders, tackle storage, accessory mounts, and securing it to your kayak.
You bought the crate. Now it's sitting next to your kayak — empty, a little confusing, and not obviously solving anything yet.
A bare crate is just a frame. The setup is what turns it into a rigged tackle station you can swap between kayaks in 30 seconds, reorganize between trips, and customize as your fishing evolves.
This guide walks through the full setup in order: tools, rod holder placement, tackle storage, accessory mounts, and how to lock the crate to your kayak so it doesn't go swimming on its own.
Total time: 60–90 minutes. Everything you need is available on Amazon for under $60.
What You'll Need
Tools:
- Power drill
- 1-3/8" hole saw (for commercial rod holder inserts) or 1/4" drill bit (for PVC zip-tie mounts)
- Permanent marker or painter's tape
- Utility knife or PVC cutter
Materials:
- 4–6 flush-mount rod holder inserts — or 12" sections of 1.5" Schedule 40 PVC pipe
- 2–3 Plano 3600 series tackle trays
- Two 1" cam straps (not bungee — more on this in Step 6)
- Zip ties, a full bundle
- Optional: one Scotty or RAM mount base plate for electronics or camera arms
Info
If you're still picking out a crate, read the kayak fishing crate guide first. Setup varies between a standard milk crate and a purpose-built kayak crate, and it's easier to plan your accessories once you know which one you're building around.
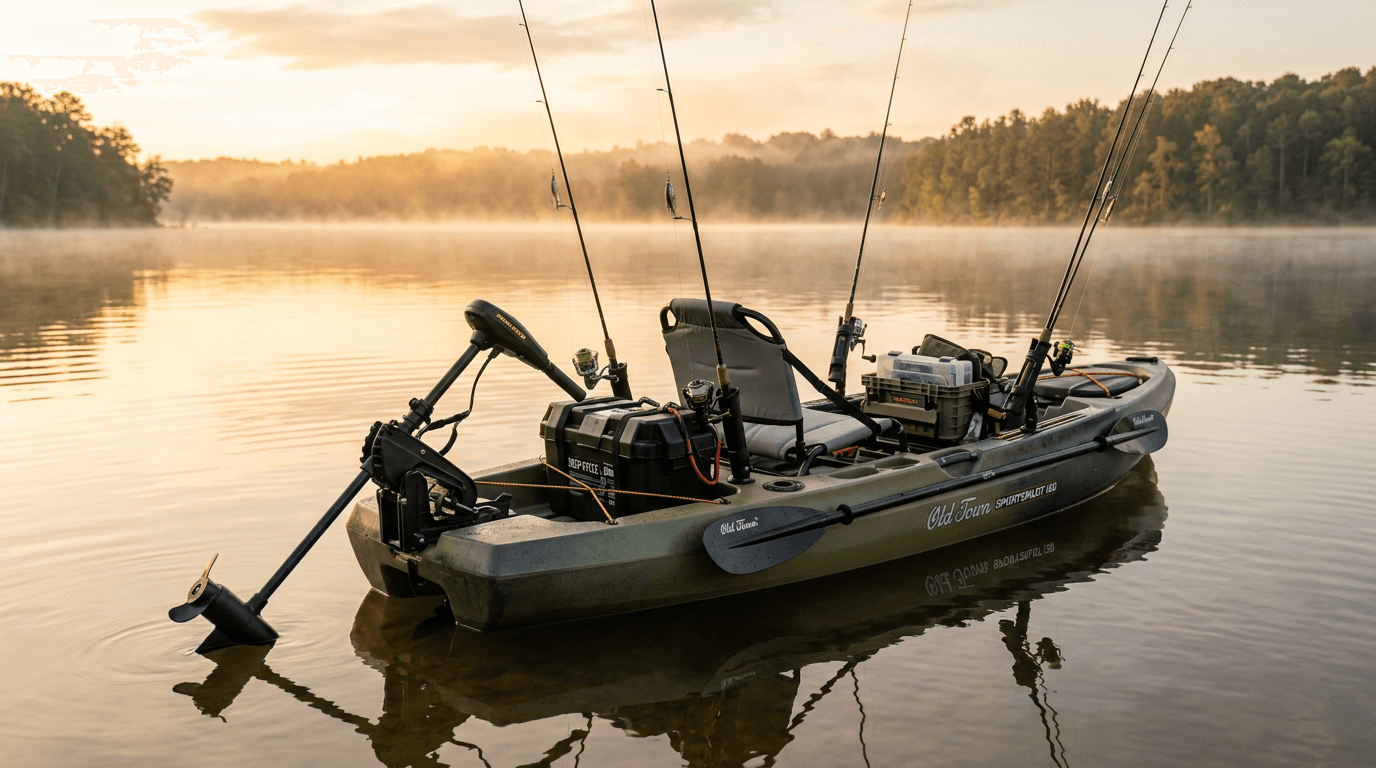
Step 1: Confirm the Fit in Your Tank Well
Before adding anything, verify the crate actually sits right.
Set it in the tank well — the recessed storage area behind the seat on most sit-on-top fishing kayaks. It should sit flat, not rock, and stay within the raised lip of the well. If it overhangs the lip, it'll shift and slide every time you paddle hard or take a wave.
Standard sizing:
- Most sit-on-top fishing kayaks fit a 12"×12" to 14"×14" crate comfortably
- Longer kayaks (13'+ like a Hobie Outback or Old Town Predator) often handle a 14"×16" crate
- Measure your tank well before drilling or attaching anything — the crate's labeled dimensions aren't always accurate
If the crate rocks on an uneven floor, cut a piece of non-slip foam mat to fit underneath. It compresses, deadens noise, and prevents gelcoat scratching over time.
Tip
Take a photo of your empty tank well with a tape measure in it before buying accessories. Tank well dimensions vary even within the same kayak model year, and you'll want the reference later.
Step 2: Plan Your Rod Holder Layout Before You Drill
This is the step most beginners skip. Don't.
Set the crate on a table and mark positions with painter's tape before cutting any holes. Standard layout: four holders in the corners, angled outward at 10–15 degrees. That angle matters — straight vertical holders drop rods at the first aggressive paddle stroke. A slight outward cant keeps them seated and spreads the rod tips apart so lines don't tangle.
Common configurations:
| Rod Count | Layout | Best For |
|---|---|---|
| 4 rods | Corner holders, angled out | Bass, walleye, general freshwater |
| 6 rods | 4 corners + 2 center-rear | Multi-technique — one rig drops shot, one runs topwater |
| 8 rods | Full perimeter | Tournament setups, guide boats |
Four corner holders is the right starting point for most kayak anglers. You can always drill more later — you can't un-drill a hole.
PVC pipe vs. commercial inserts:
- PVC pipe (1.5" Schedule 40): ~$3–5 for four holders, requires cutting and zip-tie mounting, looser rod fit. Good budget option.
- Commercial flush-mount inserts: Drop into a 1-3/8" hole saw cut, lock with a collar underneath, cleaner hold on the rod. Worth the extra $10–15.
Step 3: Install the Rod Holders
With positions taped, it's time to commit.
For commercial flush-mount inserts:
- Mark hole centers on the tape, confirm spacing one more time
- Drill straight down with the hole saw — keep it perpendicular, not angled
- Drop the insert through the hole from the top
- Thread the locking collar from underneath and hand-tighten
- Add a half-turn more with pliers — snug, not over-torqued
For PVC pipe:
- Cut 12" sections with a PVC cutter or hacksaw
- Drill two 1/4" holes through the pipe near the bottom, spaced to match two parallel crate slots
- Thread heavy-duty zip ties through the holes and crate slots, cinch down tight
- Cap the bottom of each pipe with a PVC end cap to catch anything that falls in
Either method takes about 20 minutes once the positions are marked.
Warning
Set the angle on your holders before locking them in. If you install them straight and want a cant later, you've got permanent vertical holes in your crate with no clean fix.
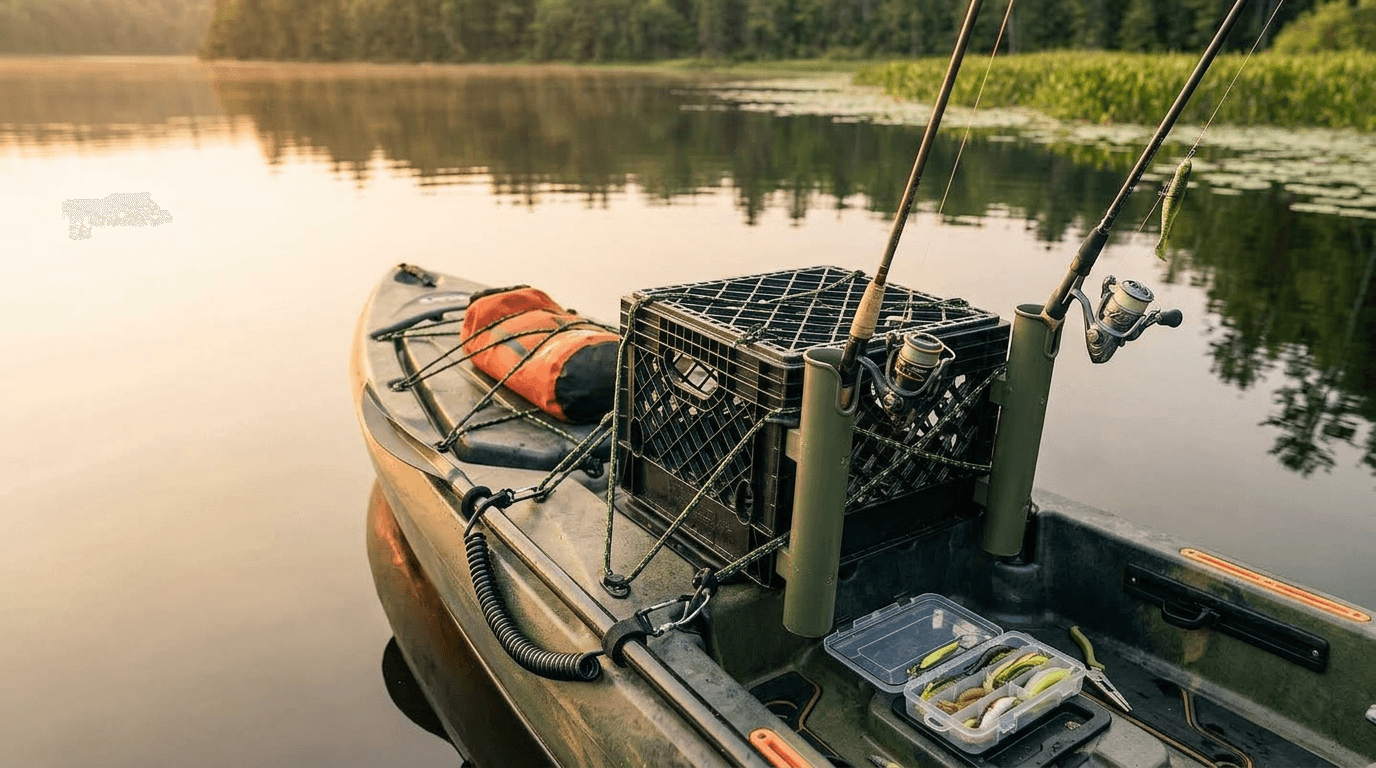
Step 4: Load In Tackle Storage
This is where the crate earns its place on the kayak.
Plano 3600 series trays are the standard for crate fishing for a simple reason: they're 11"×7"×1.75" and stack flat inside any standard milk crate or commercial kayak crate without modification. Two trays fit side by side in the bottom of most 12"×12" crates.
Basic organization:
- Bottom tray: Terminal tackle — hooks sorted by size, split shots, swivels, clip-on leaders
- Top tray: Go-to lures for the current technique and conditions
A third tray bungee-corded to the outside face of the crate works well for soft plastics. They take up more volume and you cycle through them faster — keep them accessible on the outside rather than buried inside.
Shop Plano 3600 Trays on AmazonTip
Label the inside of each tray compartment with masking tape and a permanent marker. Takes five minutes and saves you pawing through 40 compartments looking for a size 4 circle hook with a fish on the line.
Step 5: Mount Your Tools and Accessories
Once rod holders and tackle storage are set, add the accessories that turn the crate from storage into a working station.
Pliers holder: Zip-tie a magnetic tool holder or pliers leash to the front face of the crate, at chest height when you're seated. Every second you spend hunting for pliers with a fish on is a second the hook is working deeper. Front face, same spot every time, accessible without looking.
Scale and measuring tape: Clip a digital scale to a carabiner on the crate rail. A retractable measuring tape can go on the same carabiner. Measuring fish takes two seconds when the gear is already out.
Scotty or RAM mount base plate (optional): These attach to the outside of the crate using U-bolts or heavy zip ties and give you a standardized platform for camera arms, rod holders with more reach, or a small electronics bracket. If you're running a portable fish finder on the crate rather than the hull, a Scotty #230 clamp mount is the most flexible starting point.
Scotty #230 Clamp Mount on AmazonDrink holder: Underrated until hour four of a float. An aftermarket drink holder zip-tied to the rear corner keeps your water bottle from occupying tackle space inside the crate and out of the way of rod tips.
Step 6: Secure the Crate to the Kayak
This is the step beginners skip — until they lose a fully loaded crate in deep water.
A loaded crate sitting in the tank well feels solid in flat water. Add a rough boat-ramp launch, an unexpected wake, or a capsize, and an unsecured crate separates from the kayak. You lose tackle, gear, and likely your rods with it.
Use cam straps, not bungees:
Bungee cords stretch. In a capsize, that stretch gives the crate just enough slack to float free. A 1" cam strap cinched through the crate slots and through the tank well handle or scupper loop doesn't stretch — the crate stays with the kayak regardless of what happens.
Run one cam strap front-to-back through opposing crate slots, looped around the tank well anchor point. Run a second one side-to-side through the other pair of slots. Two straps crossing each other hold more securely than a single strap looped around the perimeter.
Shop Cam Straps on AmazonWarning
Check that your cam straps don't thread through slot positions that block your tackle trays. One strap crossing a tray slot means you have to unstrap the crate to remove the tray — the kind of thing you only discover mid-trip.
Common Mistakes
Using a crate that doesn't fit the tank well. A crate that overhangs or sits loose shifts constantly, rattles, scratches the hull, and eventually ends up where you didn't want it. Measure before you buy.
Installing rod holders straight vertical. Rods fall out on your first aggressive paddle stroke. Angle holders 10–15 degrees outward from center.
Overcrowding the crate. A crate packed with every piece of tackle you own is top-heavy and impossible to dig through on the water. Carry what you'll fish that day, organized by priority.
Skipping the cam straps. The crate feels stable until the one time it isn't. Two cam straps cost $10 and take 90 seconds to put on.
Using bungee cords. The stretch is exactly the problem. When everything goes sideways, bungees give. Cam straps don't.
Positioning the crate too far back. Most fishing kayaks paddle best with weight distribution slightly forward of center. A heavy crate all the way in the stern raises the bow and kills tracking. Shift it forward until the hull sits flat when you're seated.
Frequently Asked Questions
Can I use a regular milk crate?
Yes, and many anglers do. Standard milk crates are 13"×13"×11" and fit most tank wells. The structural ribs are narrower than purpose-built kayak crates, so PVC holders mount slightly differently — you may need longer zip ties or to drill directly through the walls. Plano 3600 tray fit is the same.
How many rod holders do I actually need?
Four is the right starting number. It covers a two-rod setup with two spare slots for rods you're not actively fishing. If you regularly fish with more than four rods rigged at once, add two center-rear holders before adding more corner positions.
What if my crate doesn't fit my tank well?
If it's too large, don't force it. A crate that doesn't sit flat creates mechanical stress on hull contact points over time and shifts during paddling. Size down or look at purpose-built crates in the right dimensions.
If it's too small, it'll slide around. Non-slip mat underneath and a third cross strap help, but sizing up to a crate that fills the well properly is the cleaner fix.
Do I need a lid?
Not for typical fishing. A lid turns the crate into a dry bag — useful for electronics and valuables, unnecessary for tackle. Most anglers run open and use a small waterproof pouch clipped to the rail for phone and wallet.
How do I keep my tackle from getting wet?
The trays will get splashed. Use Plano 3600 StowAway trays with individual compartment lids rather than open-face utility trays. Tackle you really can't get wet — soft plastics, wire leaders, fluorocarbon — goes in a dry bag or zip-top inside the tray.
Can I move the crate between kayaks?
Yes, and that's one of the main reasons to use a crate over bolted-on storage. Two cam straps come off in under a minute. The crate moves to any kayak with a compatible tank well. Your whole tackle setup transfers with it.
Final Notes
A well-set-up crate stops being something you think about after a few trips — it just works. Everything is where you expect it, rods are within reach, and you're not digging through a pile with a fish pulling drag.
If you haven't picked out a crate yet, the kayak fishing crate guide covers the best options at every price point and explains the differences between milk crates, commercial kayak crates, and purpose-built systems like the YakAttack BlackPak. The setup in this guide applies to all of them with minor variations.
The next piece most anglers add after the crate: an anchor trolley. Once you're fishing from a controlled position instead of drifting with the wind, everything — presentation, reading water, staying on fish — gets sharper. The kayak anchor trolley guide covers what to buy and how to install it.
About The Bite Intel Team
The Bite Intel Team researches and curates the best kayak fishing gear based on extensive product analysis, angler community feedback, and manufacturer specs.
Related Posts
How to Add a Trolling Motor to a Kayak: Complete Installation Guide
Learn how to add a trolling motor to a kayak step-by-step, including thrust sizing, mount types, wiring, battery selection, and state registration rules.
Inshore Kayak Fishing Tips for Beginners: 12 Things Nobody Tells You First
Inshore kayak fishing tips for beginners covering tides, tackle, conditions, and self-rescue so your first saltwater trip doesn't end in frustration.
DIY Fishing Kayak Setup: 7 Modifications That Cost Under $100 Total
Rig your fishing kayak with rod holders, anchor trolley, and fish finder for under $100. Step-by-step diy fishing kayak mods with specific products and prices.