Affiliate Disclosure:This article contains affiliate links. If you purchase through our links, we may earn a small commission at no extra cost to you. We only recommend gear we've tested or would genuinely use ourselves.
how to • May 15, 2026 • 23 min read · The Bite Intel Team
Inshore Kayak Fishing Tips for Beginners: 12 Things Nobody Tells You First
Inshore kayak fishing tips for beginners covering tides, tackle, conditions, and self-rescue so your first saltwater trip doesn't end in frustration.
The first time most people try inshore kayak fishing, something goes wrong that nobody warned them about. The tide runs harder than expected. Wind builds by noon. The 10-foot kayak they bought handles the chop about as well as a pool float. They end up exhausted, fishless, and questioning why they thought this was a good idea.
It doesn't have to go that way. Inshore kayak fishing has a real learning curve — but most of it has nothing to do with fishing ability. It has everything to do with understanding saltwater environments, gear limitations, and fundamentals that never make it into the YouTube setup videos.
This guide covers what actually matters for your first inshore kayak fishing trips: how to read conditions before you launch, what gear holds up in salt, where the fish are, and how to stay safe when things don't go to plan. These are the 12 things beginners consistently get wrong — or never knew to consider.
Why Inshore Kayak Fishing Is Different from Freshwater
Inshore kayak fishing for saltwater species presents challenges freshwater anglers don't encounter: tidal current that changes strength and direction throughout the day, wind that builds significantly by midday, salt water that corrodes gear twice as fast, and fish behavior tied to tidal flow rather than temperature alone.
The payoff is also different. Redfish, snook, speckled trout, flounder, and tarpon regularly push into water so shallow no powered boat can follow. A kayak gives you access to 6-inch-deep grass flats and narrow creek mouths that are completely off-limits to anything motorized. That shallow-water access is the entire advantage.
You earn it by understanding the environment well enough to work it safely and efficiently.
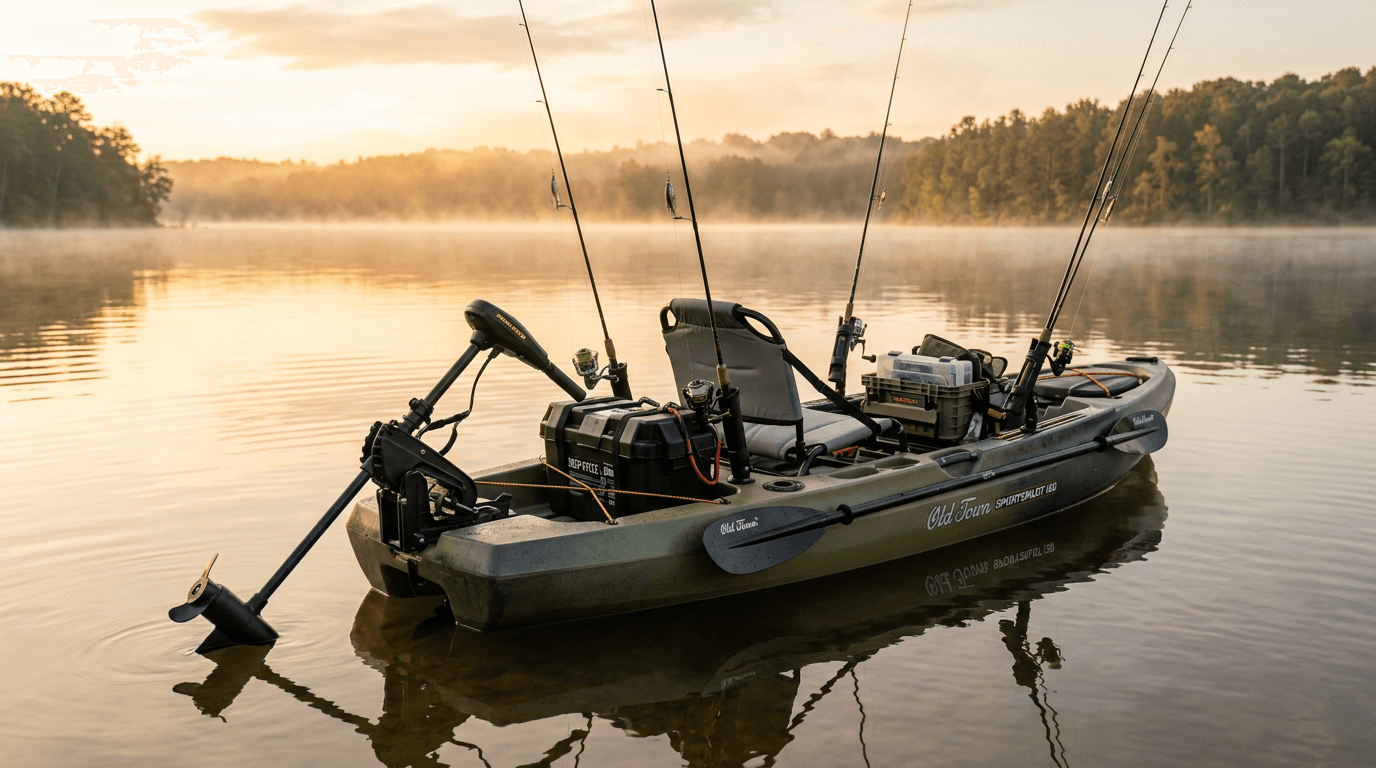
1. Choose a Kayak That Can Handle Saltwater Conditions
The right kayak for inshore fishing is a sit-on-top (SOT) design, 12 to 14 feet long, with a flat or slightly rockered hull. Shorter is not better in saltwater.
A 10-foot rec kayak will feel unstable in open water chop, won't track straight against tidal current, and sits too low to handle afternoon wind effectively. This is the most common beginner mistake — buying a short, inexpensive kayak to "test it out" and spending the first few trips fighting the boat instead of fishing it.
For saltwater kayak fishing for beginners, look for:
- Length: 12 ft minimum; 13–14 ft is ideal for open bays and coastal flats
- Width: 30–33 inches for stability when casting and fighting fish from a seated position
- Self-bailing scuppers: Water will come over the bow in chop — scuppers drain it passively without any action required
- Hull rocker: A slight curve at bow and stern helps the kayak rise over waves instead of punching through them
The Perception Pescador Pro 12 ($900) and Old Town Lure 11.5 ($800) are two of the most consistently recommended inshore starter kayaks in the sub-$1,000 range. Both are stable, track well, and self-bail properly.
For a full comparison at multiple price points, see our guide to the best fishing kayaks under $1,000.
2. Know the Minimum Safety Gear Before You Hit Salt Water
Inshore safety gear has a hard legal minimum that differs from freshwater requirements. Per the US Coast Guard, kayaks under 16 feet require: a Type I, II, or III PFD for every person aboard, a sound-producing device (whistle or air horn), and visual distress signals for coastal waters after sunset.
That's the legal floor. For inshore kayak fishing specifically, we add several more items.
Wear the PFD — don't just carry it. According to BoatUS Foundation research, 80% of kayak drowning victims were not wearing a PFD at the time of incident. Tidal current and wind can push you away from a capsized kayak faster than you can swim back. A low-profile inflatable like the Onyx MoveVent Dynamic (~$75) is comfortable enough to wear all day — it's what we recommend for anglers who resist bulky foam vests.
Check Price on AmazonLeash everything. Paddle, rod, net, landing grip. In moving inshore water, a dropped paddle drifts away immediately. Paddle leashes cost $12 and eliminate the scenario of being stranded on a flat without propulsion.
File a float plan. Before every trip, text someone: where you're launching, where you're going, and what time you'll be back. If you're overdue, they call the Coast Guard. This is the most underused safety practice in kayak fishing — takes 30 seconds and has saved lives.
VHF radio. A handheld VHF radio (Channel 16 is the hailing/distress channel) lets you contact the Coast Guard or nearby boaters if your phone dies or gets wet. The Cobra MR HH350 FLT (~$70) is fully submersible and floats — both features that matter in inshore conditions.
For a complete gear checklist, see our kayak fishing safety gear checklist.
3. Learn to Read Tides Before You Read the Water
Tide management is the skill that separates productive inshore kayak anglers from frustrated ones. Fish feed based on tidal movement — specifically, the current that flows when water moves in and out of flats, marshes, and grass beds. Knowing when to be on the water matters as much as knowing where.
How tidal flow affects inshore fish:
- Incoming tide (flood): Water pushes onto flats and into marshes, carrying baitfish and crabs with it. Predators follow. Fish the edges of grass flats and creek mouths as water rises.
- Outgoing tide (ebb): Water drains back through channels and narrow creek mouths. Fish stack at chokepoints — channel bends, oyster bars, narrow drain holes — waiting for current to funnel bait past them. Often the most productive phase of the tide.
- Slack tide: Current slows to almost nothing at the top and bottom of each cycle. Fish activity slows with it. Use slack time to reposition.
- Moving water = active fish. The two hours of strongest current on either side of high or low tide are typically your best windows on the water.
How to check tides before your trip: Use NOAA Tides and Currents or the Tide Chart app. Find the station closest to your actual launch — tides can run 45 minutes apart between stations only 10 miles away.
Wind and tide together: Wind compounds everything. A 15-knot headwind against an outgoing tide creates standing chop that is uncomfortable and inefficient to paddle. Check Windfinder.com for hourly forecasts at your specific location. For beginner inshore trips, our go/no-go line is simple: winds forecast above 12 knots are a pass, especially in the afternoon when coastal sea breezes typically build.
Tip
Check tide and wind forecasts together, never separately. A perfect tide with 20-knot wind is a bad day. A moderate tide with flat-calm conditions is often better fishing anyway.
4. The Right Tackle for Inshore Kayak Fishing
Inshore saltwater species fight differently than bass or crappie. Redfish and snook make powerful runs; speckled trout require lighter touch. Your tackle needs to handle those runs while staying compact enough to cast from a kayak cockpit.
Rod setup:
- Primary rod: 7-foot medium-light spinning rod — handles lures from ¼ oz jigs to heavier swimbaits and covers most inshore scenarios
- Heavy backup: 7-foot medium-heavy for bigger reds, oversized topwaters, or anywhere near structure where you need to stop a fish before it reaches a piling or oyster bar
Seven feet is the practical limit for comfortable kayak casting without hooking your paddle or seat back. Longer rods are awkward in tight quarters.
Reel: 2500–3000 size spinning reel with a smooth, reliable drag. Redfish test drags that feel perfectly adequate for bass fishing. The Penn Battle III and Shimano Stradic are both solid at their respective price points.
| Product | Rating | Price | Best For | Link |
|---|---|---|---|---|
| Penn Battle III 3000 | 4.5/5 | $80–$100 | Budget inshore, redfish/trout | Check Price |
| Shimano Stradic 2500 | 4.8/5 | $150–$180 | Best all-around inshore kayak reel | Check Price |
| Daiwa BG 3000 | 4.6/5 | $90–$120 | Hard use, heavy saltwater exposure | Check Price |
Line: 10–15 lb braided mainline (Power Pro or Sufix 832) with a 20–25 lb fluorocarbon leader, 18–24 inches long. Braid has no stretch — you'll feel every tap from a trout on a grass flat. Fluorocarbon leader is nearly invisible in clear inshore water and handles abrasion from redfish mouths and oyster-bar structure.
Top 3 inshore lures for beginners:
- Gulp! Shrimp 3" on a 1/8 oz jig head — catches every inshore species, almost impossible to fish wrong
- Mirrolure MirrOdine — slow-sinking twitch bait that trout and redfish can't ignore over grass flats
- Heddon Super Spook Jr. — topwater that produces explosive strikes from snook and redfish in low-light conditions
For rod comparisons, see our guide to the best fishing rods for kayak fishing.
5. How to Anchor in Shallow Inshore Water
Anchoring in inshore saltwater is different from freshwater. You're often in 1–3 feet of water over grass or sand, where a traditional claw anchor drags, snags, or spooks fish. Tidal current and afternoon wind often work against you simultaneously from different directions.
Three anchoring methods that actually work from a kayak:
Shallow water anchor stake (~$35–$60): A fiberglass or aluminum pole you push directly into sand or mud — products like the YakStick or Stick-It anchor pin. Stakes work up to 10 feet of depth and hold in moderate current without snagging grass or rattling against the hull.
Check Price on AmazonAnchor trolley system: A pulley loop along the side of your kayak that lets you position a small claw anchor at the bow or stern depending on current direction — so the kayak swings to face into the current instead of getting pushed sideways. A complete kit costs $25–$40 and makes a real difference in how you hold position in moving water. See our guide to the best kayak anchor trolley kits.
Drift fishing: Sometimes anchoring is the wrong call entirely. On an active outgoing tide, letting the kayak drift along the edge of a flat at current speed covers more water and naturally matches the pace of shrimp and baitfish moving with the tide.
Warning
Never anchor in a marked channel or waterway where boat traffic passes. Even in a no-wake zone, a boat wake hits a fixed-anchor kayak differently than a free-floating one.
6. Read Inshore Structure Like a Guide
Inshore fish don't roam randomly. Redfish, snook, and trout hold near structure that concentrates bait and provides ambush positions. From a kayak — where you can access 6 inches of water silently — you reach structure no powered boat can touch.
Key structures to target on your first inshore trips:
Grass flats: Seagrass beds hold shrimp, crabs, and small baitfish. Redfish and trout work the edges and potholes (open sandy patches within a flat) during moving tides. Approach from upwind and upcurrent — position yourself so your drift pushes lures along the grass edge rather than across it.
Oyster bars: Some of the best inshore structure for redfish. Oyster bars concentrate bait by creating current edges and provide hard cover. Cast parallel to the bar face, not perpendicular — let the lure drift along the oysters.
Creek mouths and drain holes: On an outgoing tide, position on the downcurrent side of a creek mouth and let bait come to you. Fish stack here waiting for current to funnel shrimp and mullet out of the marsh.
Dock pilings: Snook and redfish hold in the shadows of dock pilings during warm months. Use a low sidearm cast to skip a lure under dock edges — snook sitting under a dock will eat a lure that lands within 12 inches of the structure and frequently ignore the same lure landing 2 feet away in open water.
Mangrove shorelines: Primary snook territory along the Gulf and South Atlantic coast. Cast tight to the roots — within a foot. Precision matters more than distance here.
7. Practice Self-Rescue Before Your First Real Trip
Every kayak angler who spends time on inshore water eventually goes in. Wind, a big fish, a moment of inattention — it happens. The mistake beginners make is never practicing how to get back on the kayak before it happens in actual conditions.
Before your first inshore trip: Take your kayak to a pool, protected cove, or shallow water where you can stand. Capsize it deliberately. Right it. Get back on. Do it several times until you have a method that works and doesn't feel panicky. The US Coast Guard recommends practicing self-rescue skills before paddling in open or coastal water.
Standard re-entry on a sit-on-top kayak:
- Right the kayak if it flipped — SOTs flip back easily with a push on one rail
- Kick to the side behind the seat, facing the bow
- Push down on the far rail while kicking hard with both feet — use leg momentum to pull yourself across the deck belly-down
- Rotate to seated position, then get both legs into the cockpit
This takes under 30 seconds when practiced. It takes 5 uncomfortable minutes the first time in moving water with full gear. Do the practice first.
8. Protect Your Gear from Salt Corrosion
Salt water will destroy gear that performs fine in freshwater if you don't manage corrosion actively. Rod guides pit. Reel internals seize. Hooks rust between trips. Hardware fails at the worst possible time.
After every inshore trip:
- Rinse everything with fresh water immediately — rod, reel, all hardware, lures, tackle trays. Run the reel under a gentle stream for 30 seconds. Avoid high-pressure nozzles: they force salt into reel internals and accelerate the damage you're trying to prevent.
- Dry completely before storage. Wet tackle trays mold. Wet reels corrode from the inside out.
- Apply Corrosion X or reel oil to exterior reel surfaces after drying. Wipe down rod guides with a dry cloth.
- Check hook sharpness after every trip. A single inshore trip in warm saltwater is enough to dull light wire hooks. Hooks are cheap — replace liberally.
This 10-minute post-trip routine extends the life of your gear significantly. The anglers who skip it for a season are the ones shopping for replacement reels at the start of year two.
9. Choose the Right Time of Day and Season
Inshore fish are light and temperature sensitive in ways that differ from freshwater bass patterns. The patterns are consistent enough to plan around once you know them.
Time of day: Low light is most productive for inshore kayak fishing. The hour before and after sunrise, and the final hour before sunset, produce the most surface activity and aggressive feeding — especially for snook and redfish over shallow flats. Midday summer heat pushes fish into deeper water and shade. For kayak anglers without a motor, fishing the early window and getting off the water by 10 AM on summer days is often the best call for both fish activity and personal comfort.
Season (Gulf Coast and South Atlantic as reference):
- Spring (March–May): Best overall kayak season — comfortable temps, active fish, light boat traffic
- Summer (June–August): Fish early and late; midday heat makes fish lethargic
- Fall (September–November): Second-best season; baitfish migrations stack redfish and trout in predictable locations
- Winter (December–February): Slower fishing, but cold fronts concentrate fish in deeper holes and canals where they're easier to locate
Info
Inshore species vary significantly by region. The tips here apply broadly to Gulf Coast and South Atlantic fisheries (Florida, Georgia, Carolinas, Texas). Research your local fishery before your first trip — species, seasons, and regulations differ.
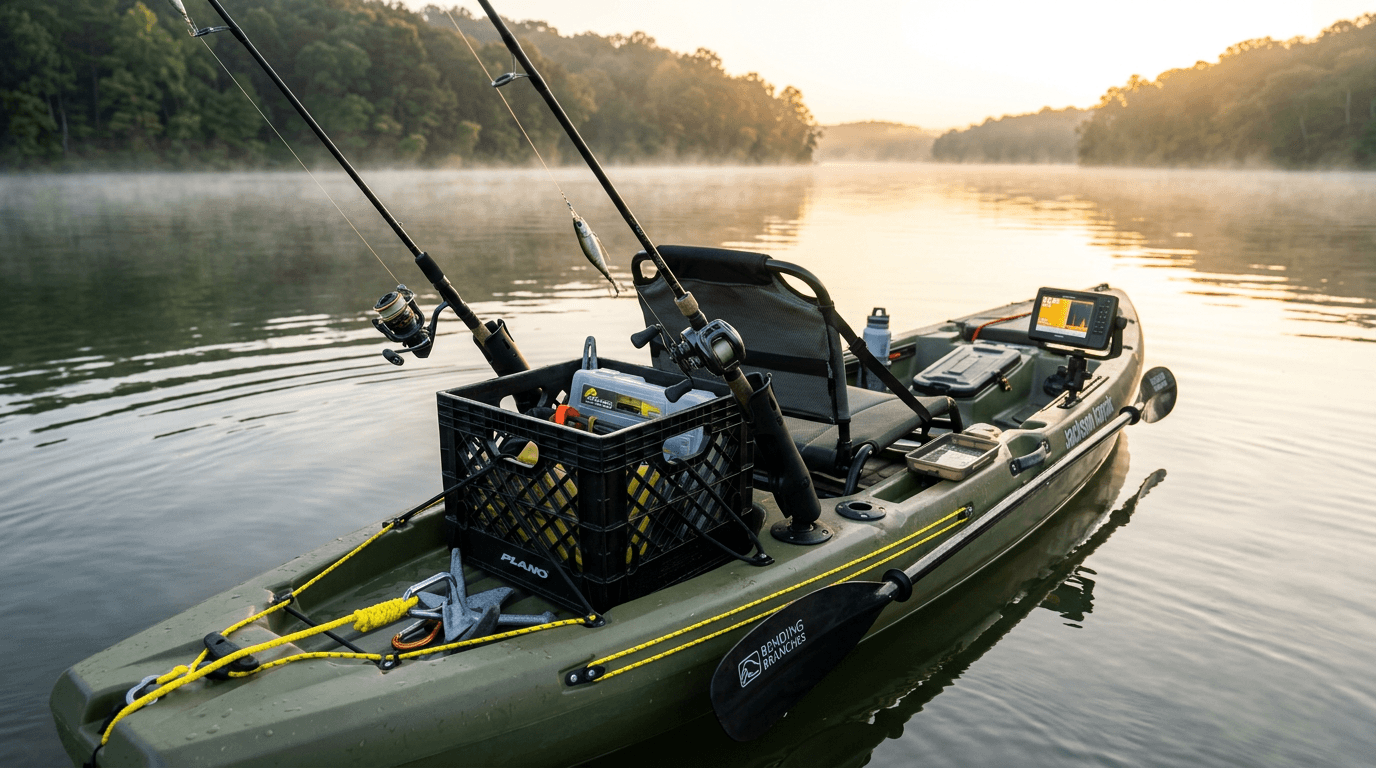
10. Find Fish With Your Eyes Before You Cast
A fish finder is useful in inshore kayak fishing, but reading visible water signs is often faster and more productive in shallow territory. Learning to spot fish — or signs of feeding fish — is one of the highest-leverage skills in kayak inshore fishing.
What to look for:
Tailing fish: In water under 18 inches, redfish tip downward to root for crabs with their tails breaking the surface. Cast 3 feet ahead of the fish (not on top of it), let the lure sink, and retrieve slowly. A tailing red is actively eating and will take a well-placed presentation.
Nervous water: A small patch with subtle ripples moving against the wind direction — baitfish getting pushed from below. The disturbance is distinct once you recognize it. Cast ahead of the movement.
Pushes: A V-shaped wake in very shallow water is a large fish moving fast. Redfish over a sand flat make a visible push you can track from 40 yards and lead with a cast.
Working birds: Diving pelicans or terns are pointing at bait being pushed to the surface by predators below. Get there quietly and start casting.
Once you're comfortable reading water visually, adding a fish finder makes sense for locating deeper structure and fish marks in murky water. The Garmin Striker 4 (~$100) is the standard entry-level unit for inshore kayak use. See our guide to the best fish finders for kayaks.
11. Dress for the Water Temperature, Not the Air
Water temperature in coastal areas often lags weeks behind air temperature in spring and fall. You can capsize into 60°F water on a day that felt like a t-shirt morning from shore.
The rule: Dress for the water temperature, not the air. If water is below 70°F, plan for capsize with a wetsuit or paddling dry top. Cold shock — the involuntary gasp reflex when entering cold water — is a primary factor in kayak drowning incidents, particularly in winter and early spring.
For warm-summer inshore fishing, sun protection is the priority: UPF 50+ long-sleeve shirts, a wide-brim hat, polarized sunglasses (which also help you see fish in clear shallow water), and waterproof reef-safe sunscreen. Inshore heat reflected off the water surface is intense in ways that differ significantly from fishing from shore.
Check Price on AmazonSee our full guide to what to wear kayak fishing for seasonal gear breakdowns by water temperature.
12. Plan Your First Three Trips Around Learning, Not Catching
The beginners who get good at inshore kayak fishing fastest are the ones who resist trying to cover too much water too early. Over-ambitious first trips — too far from the ramp, unfamiliar water, new gear — create the conditions for a bad experience.
For the first three inshore trips:
- Launch from a protected ramp with no significant tidal current at the launch site itself
- Stay within 10–15 minutes paddling distance of the ramp
- Target moving water windows — typically 1–2 hours before and after high or low tide
- Bring more water than you think you need — a full day in salt heat and sun depletes you faster than freshwater fishing
- Save Google Maps offline before you launch — inshore marshes look identical from every angle, and getting disoriented is easy
The goal for trip one isn't a limit of reds. The goal is getting comfortable in saltwater conditions, understanding how your kayak handles chop and current, and identifying two or three spots worth returning to. The access a kayak gives you to shallow inshore water is unlike anything else in fishing. You earn it by putting in the initial groundwork.
Frequently Asked Questions
Is a 10-foot kayak too small for inshore saltwater fishing?
For most inshore environments, yes. A 10-foot kayak handles protected bays on calm days but tracks poorly against tidal current, sits lower in the water in chop, and becomes difficult to control in anything above 10 knots of wind. The minimum for consistent inshore use is 12 feet — 13 to 14 feet is more comfortable in open bay conditions and outright necessary on coastal flats with significant fetch.
How do I handle waves and chop on a fishing kayak?
Angle your bow into waves at 20–45 degrees rather than hitting them head-on or taking them broadside. Broadside waves are the most dangerous orientation in a loaded fishing kayak. Lowering your center of gravity — leaning slightly forward, keeping heavy gear low and centered — helps significantly. Most importantly: check the forecast before you go. Conditions above 12-knot winds are not beginner inshore territory.
Do I need a pedal kayak for inshore fishing, or is a paddle kayak fine?
A paddle kayak covers the majority of inshore fishing scenarios and is completely adequate for beginners. Pedal drives give you hands-free operation while casting and fighting fish — valuable for precise positioning on current and wind simultaneously. But a quality pedal kayak costs 2–3× more than a comparable paddle kayak. Start with a paddle kayak in the $800–$1,100 range, fish inshore for a season, and upgrade when you know you want the hands-free advantage.
How do I get back on my kayak if I fall in?
For a sit-on-top in open water: right the kayak if it flipped, kick to the position behind the seat facing the bow, push down on the far rail while kicking hard to pull yourself across the deck belly-down, then rotate to a seated position. Practice this deliberately in shallow water before your first inshore trip — doing it for the first time in current with gear on is the wrong time to learn the mechanics.
What leader should I use for inshore saltwater kayak fishing?
20–25 lb fluorocarbon leader, 18–24 inches long, attached to 10–15 lb braided mainline with a double uni knot or FG knot. Fluorocarbon is nearly invisible in clear inshore water and resists abrasion from oyster bars, pilings, and redfish mouths better than monofilament. Go heavier (30 lb) for snook near structure where you need to stop a run before the fish reaches cover.
Inshore kayak fishing rewards systematic learning more than almost any other style of fishing. Fish the same two or three spots hard until you understand them, keep notes on what worked and when, and don't measure early trips by fish count. The access a kayak gives you to shallow inshore water is genuinely unlike anything else in fishing — the learning curve is real, and worth every bit of it.
Related Posts
How to Add a Trolling Motor to a Kayak: Complete Installation Guide
Learn how to add a trolling motor to a kayak step-by-step, including thrust sizing, mount types, wiring, battery selection, and state registration rules.
DIY Fishing Kayak Setup: 7 Modifications That Cost Under $100 Total
Rig your fishing kayak with rod holders, anchor trolley, and fish finder for under $100. Step-by-step diy fishing kayak mods with specific products and prices.
Fishing Kayak Set Up: 9 Rigging Essentials (in the Order You Actually Need Them)
Complete fishing kayak set up guide with priority order, specific product names, and real prices. Budget setup ~$151, full rig ~$456.