Affiliate Disclosure:This article contains affiliate links. If you purchase through our links, we may earn a small commission at no extra cost to you. We only recommend gear we've tested or would genuinely use ourselves.
buying guide • May 15, 2026 • 15 min read · The Bite Intel Team
Fishing Kayak Attachments: The Complete Rigging and Mounting Guide
Best fishing kayak attachments explained — track systems, rod holders, fish finder mounts, anchors, and storage. What to buy, where to mount it, and how.
Most anglers buy a new kayak, bolt on a couple of cheap flush-mount rod holders, and call it rigged. Six months later they're duct-taping a fish finder to the bow and wondering why their crate keeps sliding around.
Getting your fishing kayak attachments right from the start costs about the same as doing it wrong twice. This guide covers every major mounting category — track systems, rod holders, electronics mounts, anchor hardware, and storage — with specific products, prices, and where each piece goes on the hull.
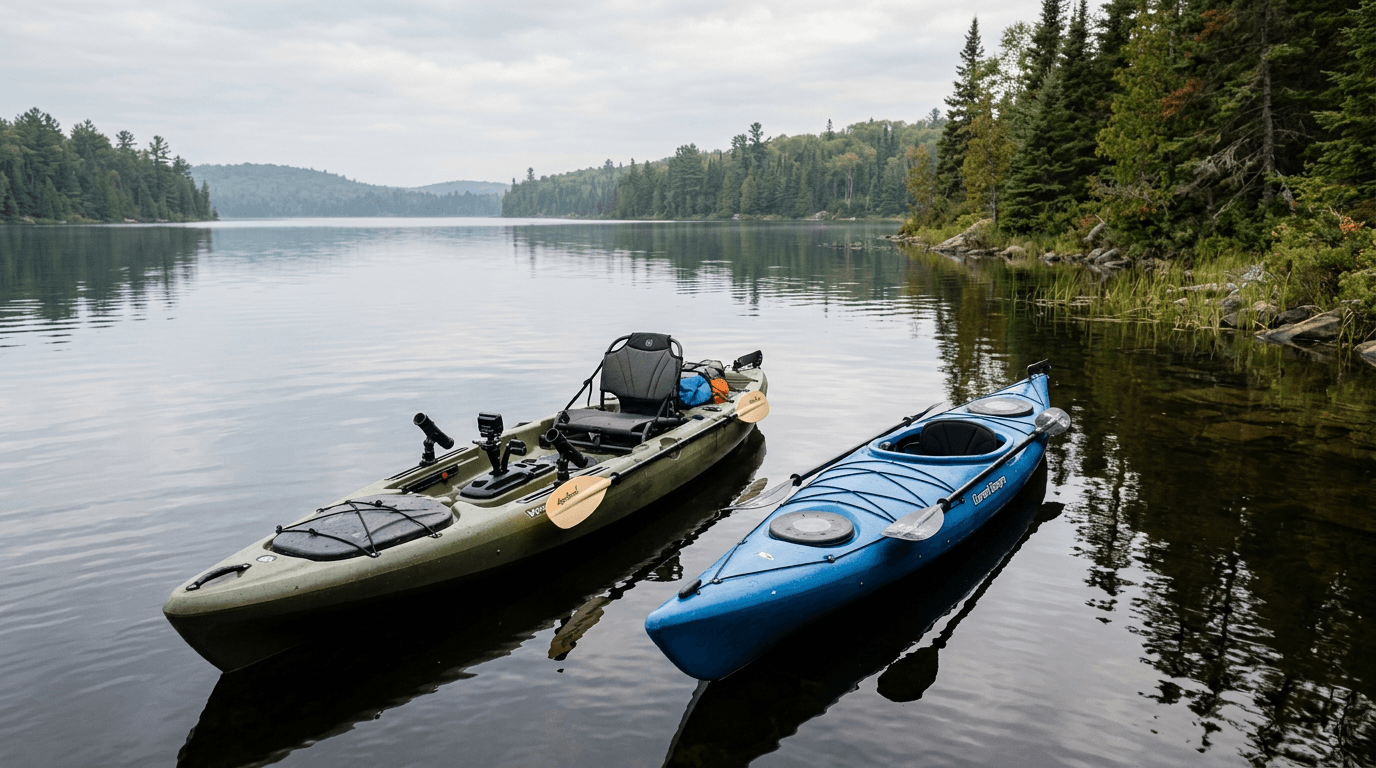
We've tested these setups on sit-on-tops from Old Town, Wilderness Systems, and Hobie. The principles apply to any fishing kayak whether you're running freshwater bass lakes or inshore saltwater.
The Three Mounting Systems Behind Every Fishing Kayak Attachment
The three mounting systems used for kayak fishing attachments are gear track (bolt-anywhere rail), RAM ball mount (adhesive or bolt-down base with interchangeable arms), and direct drill-mount (permanent through-hull hardware). Most rigs use all three — tracks for reconfigurable items, RAM for electronics, and drill-mount for high-load anchors.
Understanding which system fits which attachment saves you from drilling a hole you'll regret.
Gear Track Systems (GearTrac, Railblaza StarTrack)
Gear tracks are rails that run along your gunwales or deck. You slide a T-bolt into any position on the track and lock it. The big names are YakAttack GearTrac40 ($25 per 18" section) and Railblaza StarTrack ($30 per section).
Most mid-range fishing kayaks (Old Town Sportsman, Wilderness Systems A.T.A.K., Lifetime Tamarack Pro) come with factory track sections already installed. If yours doesn't, you install tracks with four stainless screws and marine sealant — no special tools. The YakAttack 24" GearTrac GT90 is the standard that most third-party accessories are built around.
Best for: Rod holders, camera mounts, drink holders, paddle holders — anything you want to reposition between trips.
Tip
Run tracks parallel to the cockpit on both sides. A 24" section port and starboard puts rod holders within reach from the seat without turning around. Add a 12" section at the bow for an electronics arm.
RAM Ball Mount Systems
RAM Mounts use a ball-and-socket system: a ball base goes on the kayak (via adhesive, single bolt, or track adapter), a double-socket arm snaps in, and your device clamps to the other end. The RAM-B-101U 1" ball base with diamond plate (~$12) is the universal starting point.
Every major fish finder brand — Garmin, Lowrance, Humminbird — has an OEM RAM mount kit. The arms are interchangeable, so once you have bases on the kayak you can move your fish finder, phone mount, and GoPro between them without any tools.
Best for: Fish finders, GPS units, action cameras, phones — anything electronic that needs to angle toward you.
Direct Drill-Mount
Some attachments need a permanent through-hull bolt with a backing plate. Flush-mount rod holders, anchor trolley cleats, and heavy-duty crate tie-downs fall in this category. Use 316 stainless hardware and apply marine sealant (Sika 291 LOT is the standard) under every fitting.
The fear of drilling into a new kayak is real but overblown. Polyethylene hulls are thick and forgiving. What kills them is using too-small hardware, skipping sealant, and cranking the bolt down until the deck cracks. Snug plus a quarter turn is enough.
Best for: Flush-mount rod holders, anchor cleats, any attachment that takes lateral force.
| Product | Rating | Price | Best For | Link |
|---|---|---|---|---|
| YakAttack GearTrac40 24" | 4.8/5 | $25–$40 | Reconfigurable rod holders, accessories | Check Price |
| Railblaza StarTrack 580mm | 4.6/5 | $28–$35 | Camera mounts, side-mount accessories | Check Price |
| RAM-B-101U 1" Ball Base | 4.7/5 | $10–$15 | Fish finders, GPS, phones, cameras | Check Price |
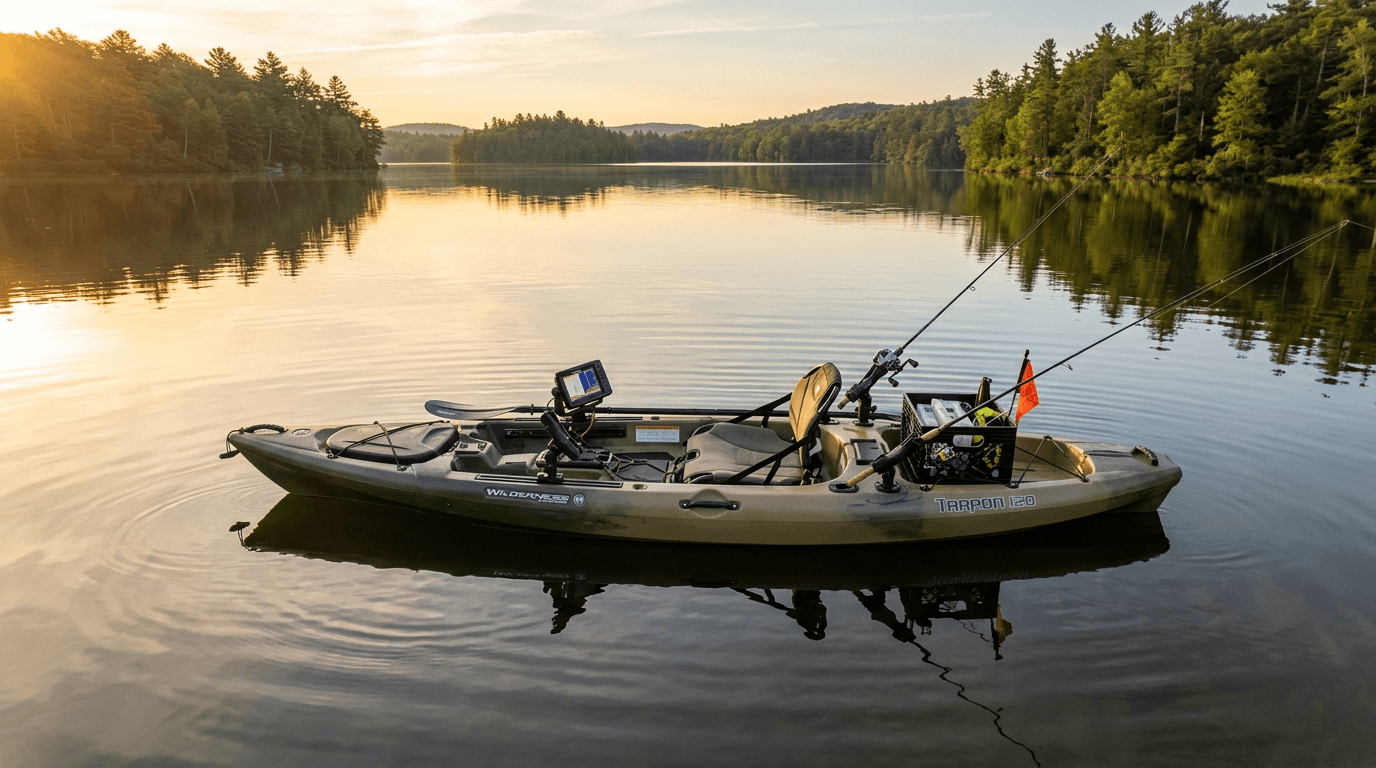
Rod Holders — The First Fishing Kayak Attachment You Need
The best rod holder for most fishing kayaks is the YakAttack Omega Pro ($30), which slides into any GearTrac section and holds any rod angle from vertical to horizontal. If your kayak has no track, the Scotty #280 Baitcaster with a deck mount ($35 total) is the best drill-mount alternative.
You'll want two rod holders minimum — one on each side — and four if you run multiple rigs or fish with a downrigger. The three types worth knowing:
Flush-mount tube holders go into a pre-drilled deck hole (typically 1-7/8" diameter). They're low-profile and handle light trolling loads, but you can't adjust angle after installation. Railblaza Rod Holder II (~$22) fits this slot well.
Track-mounted holders slide anywhere on GearTrac and adjust without tools. YakAttack Omega Pro (~$30) locks any rod at 0–90° and releases with one button. This is what we use on our primary builds.
RAM rod holders use the ball-socket system for the most flexible positioning. The RAM-ROD 2000 (~$55) mounts on any RAM base and rotates 360°. Overkill for simple still-fishing; ideal for trolling setups where you want the rod far out to the side.
We've covered the full range of options in our kayak rod holder buying guide, including recommendations for specific fishing styles.
Check Price — YakAttack Omega ProFish Finder Mounts and Transducer Arms
Mount your fish finder to a RAM-B-101U ball base positioned just forward of your right knee — this puts the screen visible at a glance without blocking your casting arm. The transducer goes through a scupper hole (no drilling) using a YakAttack Zooka Tube arm (~$40) or zip-tied inside the hull if your kayak is HDPE.
The electronics mount is where most anglers overthink the hardware and underthink the positioning. Your fish finder should be readable at a glance without you leaning forward — the same way a car dashboard works.
Scupper transducer mount (no-drill): The YakAttack Zooka Tube Scupper Mount (~$40) drops into any 2.5" scupper hole and positions a transducer arm at the side of the hull. Works on Lifetime, Pelican, and most budget sit-on-tops. No holes required.
Through-hull transducer (permanent): If you want maximum signal quality, drill a 1-1/4" hole, epoxy a transducer shoot-through housing into the hull, and run the cable inside. This is the right call if you're running a Garmin Striker Vivid 7 or Lowrance HOOK Reveal on a premium kayak you'll keep for years.
Shoot-through-hull (zero work): For HDPE kayaks, you can simply lay the transducer inside the hull submerged in a small pool of vegetable oil or water. Signal reads through the plastic. It works — we've done it. You lose about 10–15% of depth reading accuracy, which matters if you're fishing in 40+ feet.
Check Price — RAM Fish Finder Arm KitInfo
Run your transducer cable along the inside of the hull (under the deck) rather than across the top. It keeps things clean, prevents snags, and takes 10 minutes with adhesive cable clips from any hardware store.
Anchor Systems: Trolleys, Stake-Out Poles, and Drift Socks
The right anchor attachment for a fishing kayak depends on water depth. Under 6 feet: use a stake-out pole (YakAttack Leverage Stake-Out Pole, $60). Depths of 6–20 feet: use a folding grapnel anchor ($20) on an anchor trolley kit. Open water wind drift: add a drift sock (~$15) to a stern cleat.
An anchor trolley — a pulley and rope system running from bow to stern along the gunwale — lets you reposition your anchor point without pulling the anchor up. You swing the angle of the kayak by moving the trolley ring forward or back. It's the single most useful attachment for fishing current or wind-blown lakes, and we've broken down the best kits in our kayak anchor trolley guide.
Stake-out poles are the fast option for shallow water. The YakAttack Leverage Stake-Out Pole ($60) clamps to your gunwale and plunges a fiberglass pole into soft bottom. For hardpack or rocks, a Power-Pole Micro Anchor ($299) uses hydraulics for silent, instant holding — overkill for most freshwater use, essential for bass tournament anglers.
Grapnel anchors fold flat for storage. A 1.5 lb folding grapnel (~$20) handles most freshwater conditions. In tidal or heavy current water, go 3 lbs. Pair it with 50' of 3/16" nylon anchor rope and a quick-release float so you can dump the anchor if you flip.
Check Price — Folding Grapnel Anchor KitCrates, Tackle Storage, and Milk Crate Setups
The YakGear Complete Outfitter Crate Kit (~$65) is the best ready-to-run fishing kayak storage attachment for most sit-on-tops — it ships with four rod holders, a leash, and deck rigging included. If you're budget-minded, a standard milk crate plus 4 pieces of 3/4" PVC pipe costs under $12 and does the same job.
The crate sits in the rear tankwell and becomes command central for tackle, rods, and a small cooler. Most anglers bungee the crate down using the existing rigging points — no drilling required. If your kayak has no tankwell rigging eyelets, add two RAM Mounts twist-lock bases (~$8 each) and use S-hooks.
What goes in the crate:
- 2–3 tackle trays (Plano 3600 series fit perfectly side by side)
- A soft-sided cooler for fish or lunch (Engel HDX 13 Cooler, ~$70, fits most crates)
- Pliers, hook remover, and line scissors in a mesh pocket on the outside
The downside of crates: they catch wind and can pop out in rough water if not secured well. Run a short leash from the crate handle to a deck fitting. We've seen too many crates float off downriver.
We wrote a full breakdown on setup options in our best kayak fishing crate guide.
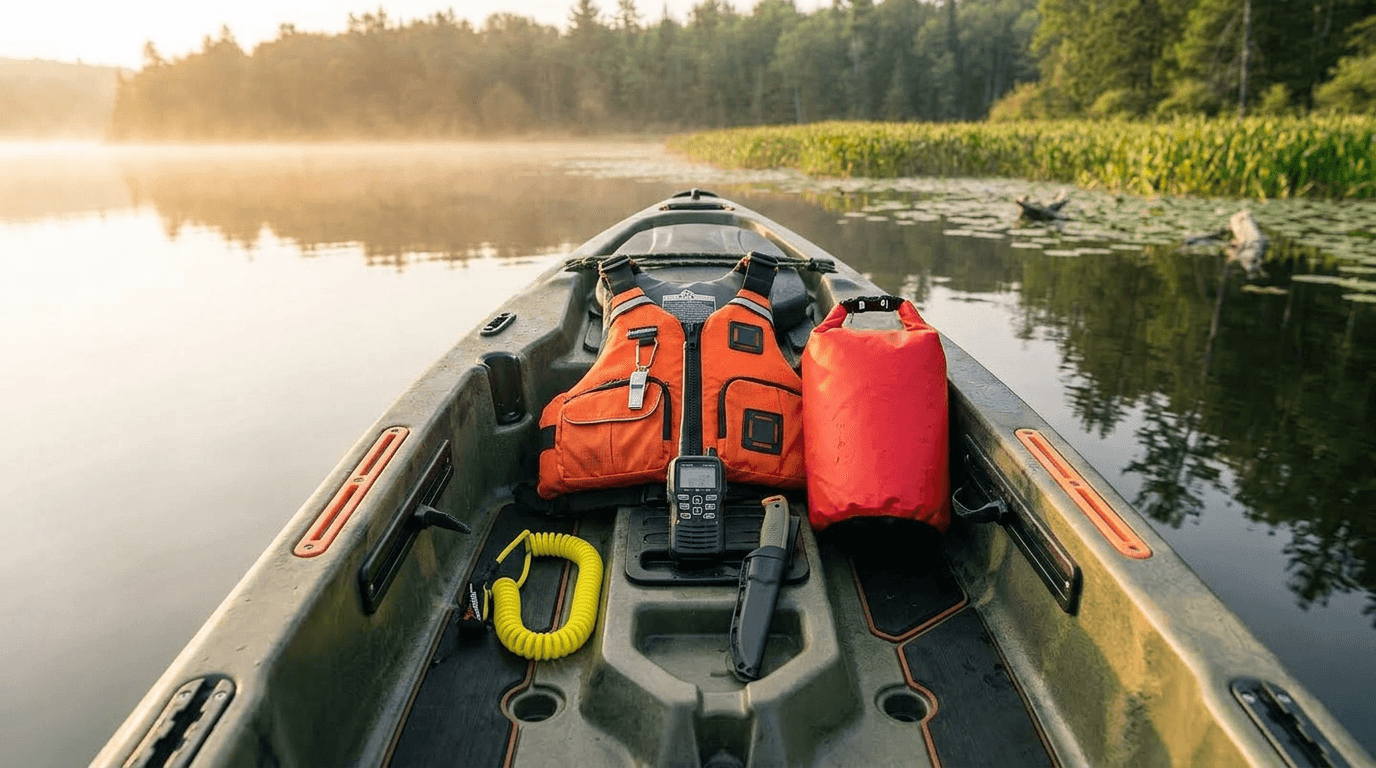
Check Price — YakGear Outfitter Crate KitTethers, Dry Bags, and the Gear That Falls Overboard
Every rod, net, and piece of electronics should be tethered to the kayak — not to you. Use coiled fishing tethers (~$8 each) clipped from the item to a deck ring. Net tethers attach at the handle. Electronics cables prevent them from sinking if they bounce off the mount. The rule: if it costs more than $20 or you'd be stranded without it, it gets a leash.
This is the section most rigging guides skip, and it's the reason anglers lose nets, fish finders, and paddles.
Gear tethers: YakAttack PadHooky (~$8) is a coiled tether with carabiner ends. Use one per rod holder, net, and fish finder mount. Attach one end to the item, the other to a deck loop or GearTrac bolt.
Dry bags: Keep your phone, wallet, and car keys in a dry bag regardless of weather. Sea to Summit 5L Ultra-Sil Nano Dry Sack (~$25) packs down to a fist. Attach it to a deck D-ring — not left loose in the cockpit. More options are in our kayak fishing dry bag buying guide.
Paddle leash: A basic paddle leash (~$10) attaches your paddle to your PFD or a deck cleat. You'll drop your paddle twice a year reaching for a fish — once without a leash is enough to understand why.
Warning
Don't tether gear to yourself — tether it to the kayak. If you flip, you want everything attached to the hull, not dragging on you while you swim.
Weight, Load Capacity, and Balance — The Part Most Rigging Guides Skip
A fully-rigged fishing kayak picks up 20–40 lbs of attachment hardware before you add tackle, water, and fish. Know your kayak's weight capacity (printed on the hull near the scupper holes), subtract your body weight and gear, and keep a minimum 50 lb margin. Exceed that and the kayak sits low, handles poorly, and becomes a swim lesson.
Most 12-foot sit-on-tops have a rated capacity of 350–450 lbs. A 200 lb angler in full gear leaves 150–250 lbs for everything else. A fully-kitted crate, fish finder, anchor system, and tackle weighs 25–35 lbs. You're fine on most rigs — but stack up a trolling motor, an oversized cooler, and full tackle and you'll feel the difference in stability.
Balance rules we follow:
- Heavy items (cooler, trolling motor battery) go centered and low in the hull
- Tackle goes in the rear tankwell, not behind you on the bow
- Electronics go forward of the seat where you can see them without reaching
- Nothing above the gunwale line except rod tips
The kayak should sit level side-to-side when you're seated and in paddling position. If it lists to one side, redistribute until it doesn't. A listing kayak is exhausting to paddle and unpredictable in a chop.
According to the US Coast Guard, most kayak capsizes involve overloaded or top-heavy vessels — not rough water. Load discipline is the most underrated part of rigging.
For a full walk-through of how these pieces come together on a complete build, see our how to rig a kayak for fishing guide.
Frequently Asked Questions
Can I add fishing attachments to a kayak without drilling?
Yes — most modern fishing kayak attachments work without drilling. Track mounting systems (YakAttack GearTrac) install with four stainless screws and sealant, but RAM Mount adhesive bases require zero holes. Scupper transducer mounts work through existing scupper holes. The only items that genuinely need through-hull drill mounts are flush-mount rod holders and anchor trolley cleats.
What track system is compatible with most fishing kayaks?
YakAttack GearTrac40 is the industry-standard track that the vast majority of third-party accessories are built around. Scotty and RAM both make GearTrac-compatible adapters. Railblaza's StarTrack uses a different bolt pattern and works great with their own accessory lineup but has less third-party compatibility. If you're starting from scratch, go GearTrac40.
How do I keep accessories from falling overboard?
Tether everything with a coiled fishing tether (~$8 each). Clip one end to the item, the other to a deck ring or GearTrac bolt. For items in the crate, bungee the whole crate down to the tankwell rigging with two points of contact. Electronics that mount on RAM arms should also have a safety leash from the arm base to the transducer cable, so a loose connection doesn't mean a sunk fish finder.
Is a fish finder worth it for kayak fishing?
For fishing water deeper than 8 feet or targeting suspended fish (crappie, bass in the water column, catfish), a fish finder pays for itself fast by cutting search time. For shallow flats, sight-fishing, and small ponds, it's genuinely optional — you can feel the structure and read the water without electronics. A Garmin Striker 4 (~$100) is the starting point; it's where we'd put the money before spending on anything more sophisticated.
How much weight can I add to a fishing kayak?
Subtract your body weight and clothing (~10 lbs) from your kayak's rated capacity (printed near the cockpit or on the manufacturer's website). Keep a minimum 50 lb buffer in the remaining number. A standard sit-on-top rated at 400 lbs for a 200 lb angler leaves 150 lbs for gear — far more than a typical full rig requires. Problems arise when anglers add trolling motors, large batteries, and full-size coolers simultaneously.
The first two attachments to install on any fishing kayak are a track section on each gunwale and a pair of Omega Pro rod holders. That $90 combination turns a bare hull into an actual fishing platform. Everything else — fish finder, anchor, crate, tethers — layers on top in whatever order your fishing style demands. Get the track system right and you can swap, add, and reposition everything else without touching a drill.
Related Posts
Angler Kayak vs Regular Kayak: 7 Key Differences That Change How You Fish
Angler kayak vs regular kayak — the real functional differences in stability, storage, speed, and cost. Plus whether your regular kayak is worth converting.
Kayak Fishing Accessories: What to Buy First, What to Skip, and How to Build the Right Setup
Which kayak fishing accessories are worth buying? We break down every category by priority and budget — rod holders, anchors, fish finders, and more.
Kayak Fishing Safety Gear Checklist: 12 Must-Haves Before You Launch
Kayak fishing safety gear checklist: 12 must-haves, USCG legal requirements, and fishing-specific items most guides miss — with specific brand picks.